
If you've been searching for a gluten-free sourdough starter recipe that actually works — without exotic flours, complicated ratios, or a science degree — you're in the right place. This is the exact starter I've kept alive on my kitchen counter and in my fridge for months, and it's what I use to bake fresh, homemade gluten-free sourdough bread almost every single day.
I know "sourdough starter" can sound intimidating, especially the gluten-free version. But I promise, this is genuinely one of the easiest things you'll make in your kitchen. All you need is a store-bought gluten-free flour blend, water, a little sugar, and a 32 ounce wide mouth mason jar. That's it.
To make this sourdough starter recipe super easy, I suggest King Author Gluten-Free Bread Flour or Bob's Red Mill 1-1 Gluten-Free Flour. I have tested these flours with this recipe and sourdough bread for the easiest way to make it on repeat daily. Those two flours are my favorite in gluten-free baking.
In this post, I'll walk you through exactly how to make your starter from day one, what "feeding" a starter actually means (and why it matters), how to know it's ready, and how I keep mine going long-term while baking fresh bread for my family.
Jump to:
- Why You'll Love This Gluten-Free Sourdough Starter
- What You'll Need
- How to Make a Gluten-Free Sourdough Starter (Step-by-Step)
- What does "feeding" a starter mean?
- How I Keep My Starter Going (Baking Fresh Bread Daily)
- Tips for Sourdough Starter Success
- Recipe FAQs
- More Gluten-Free Bread Recipes
- Gluten-Free Sourdough Starter
Why You'll Love This Gluten-Free Sourdough Starter
Only 3 ingredients — gluten-free flour blend, water, and sugar
- No special equipment — just a 32-ounce mason jar
- Beginner-proof — no guesswork, just a simple twice-daily routine
- Long-lasting — once established, this starter can live in your fridge for months (mine has!)
The base for fresh, homemade sourdough bread — no more store-bought gluten-free bread with the ingredient list you can't pronounce.
What You'll Need
- A clean 32-ounce mason jar
- ¼ cup gluten-free flour blend twice a day to get it started (a store-bought all-purpose gluten-free blend works great — see notes below)
- ¼ cup water twice a day
- 1 tablespoon sugar (for the initial mix)
- A whisk or fork for mixing
A note on flour: You do not need a specialty flour to make this work. A standard store-bought gluten-free all-purpose flour blend is exactly what I use, and it's what keeps this recipe so accessible. No hunting for sorghum flour or mixing your own blend required. I wanted to keep this gluten-free sourdough starter and my gluten-free sourdough bread recipe super easy and fool-proof!

How to Make a Gluten-Free Sourdough Starter (Step-by-Step)
Step 1: Mix Your Starter
In your 32-ounce mason jar, combine:
¼ cup gluten-free flour blend
¼ cup water
1 tablespoon sugar
Mix briskly with a fork or whisk until fully combined. Cover loosely (a lid set on top wtih plastic wrap or a mesh bag with a rubber band, works well) and set the jar somewhere at room temperature, out of direct sunlight.
Step 2: Feed Your Starter Twice a Day
Every morning and night for about 5 days to a full week, you'll "feed" your starter. Here's exactly what that means and how to do it:
What does "feeding" a starter mean?
Feeding simply means removing a small portion of the starter and replacing it with fresh flour and water. This does two important things: it gives the wild yeast and bacteria living in your starter fresh food (the flour) to keep multiplying, and it keeps the mixture from becoming overly acidic or too thick, which can slow down or stall fermentation. Think of your starter as a living thing — feeding it regularly is what keeps it active and healthy enough to eventually rise bread.
How to feed your gluten-free sourdough starter:
Discard 1 tablespoon of the mixture from the jar
Add ¼ cup gluten-free flour blend
Add ¼ cup water
Whisk briskly for about 30 seconds — this is important, as it works air into the mixture, which helps feed the natural yeast
Repeat this process every morning and every night for approximately 5 days to a week.
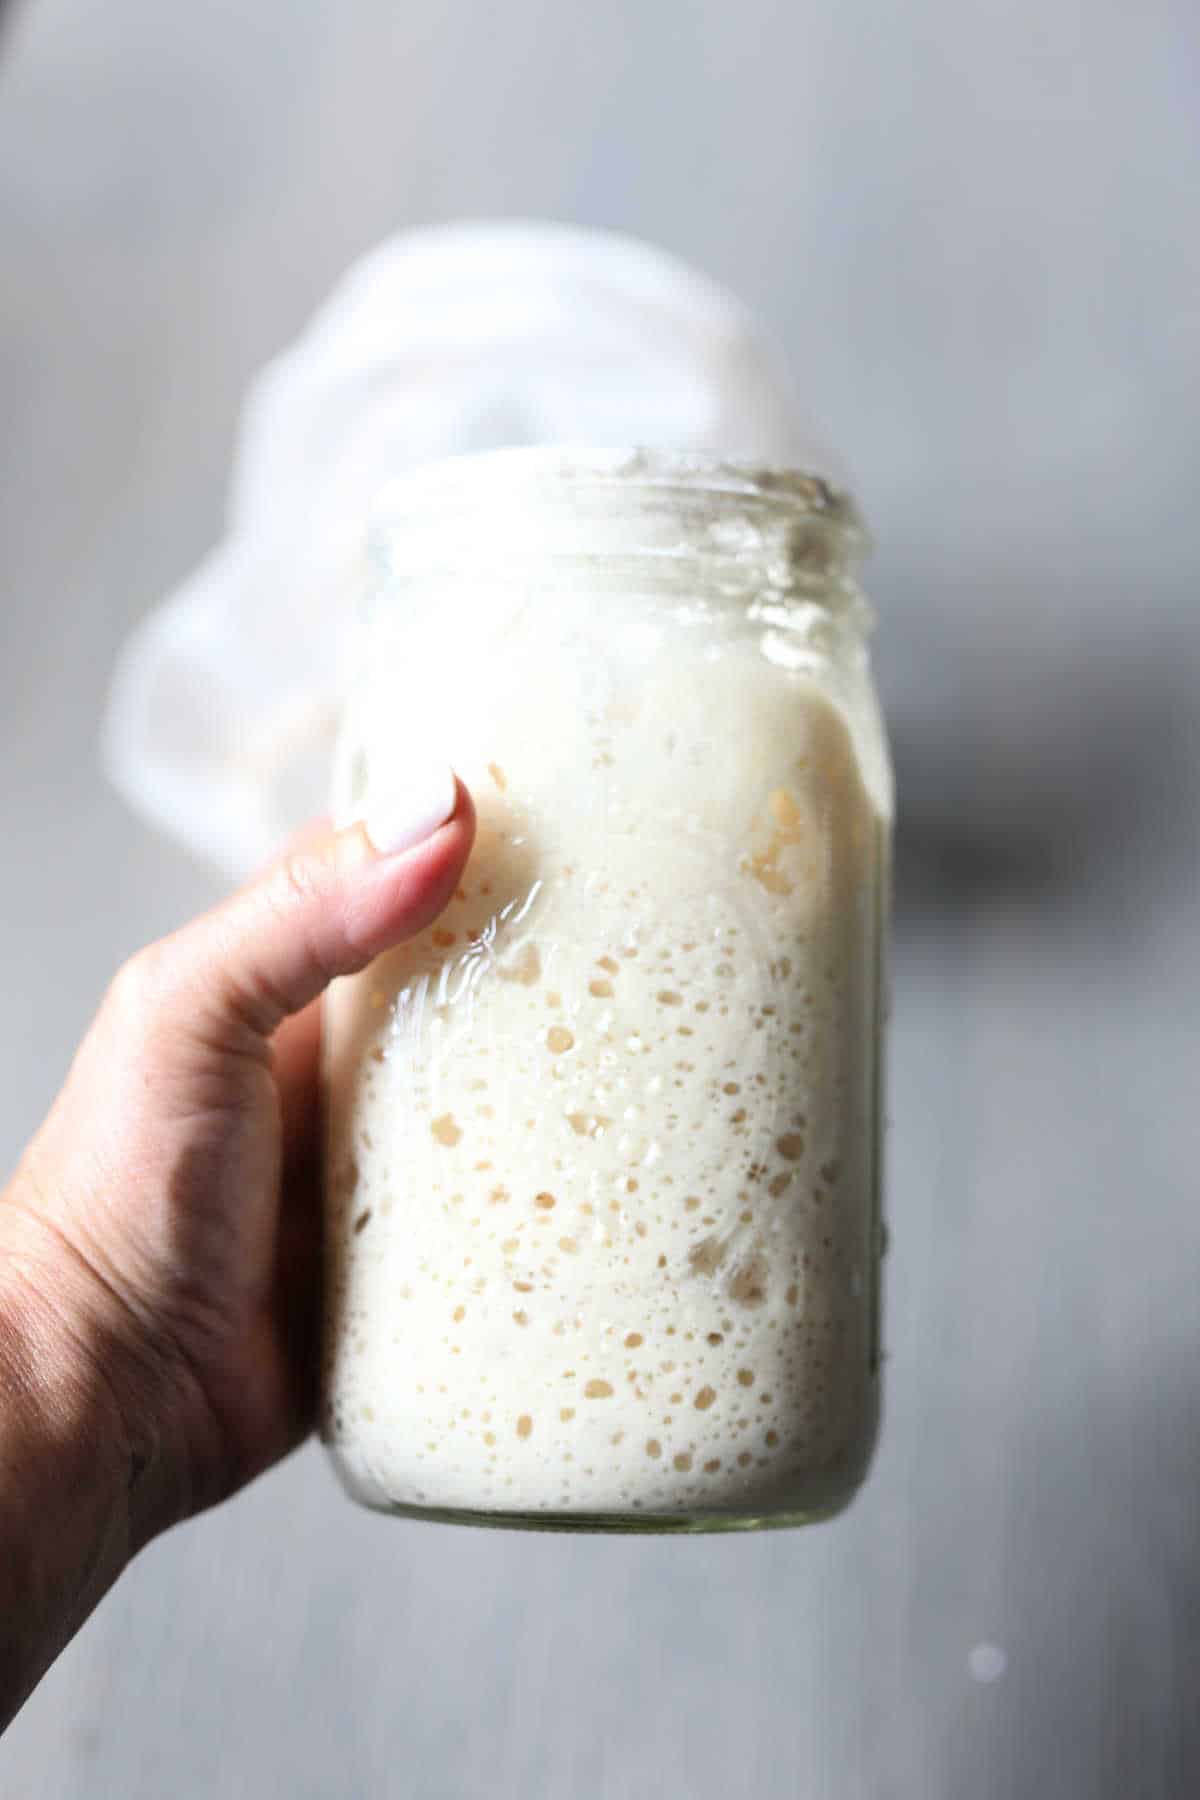
Step 3: Watch for Bubbles
You'll know your starter is alive and active when you start to see bubbles forming on the surface and throughout the mixture. This is the wild yeast and bacteria doing their job, producing carbon dioxide as they ferment. Depending on your kitchen's temperature and the flour blend you're using, this can take anywhere from 5 days to a full week. Some starters take a little longer — don't get discouraged if yours needs an extra day or two.
Step 4: Store and Maintain
Once your starter is bubbly and active, you have two options:
- Use it right away to make your first loaf of gluten-free sourdough bread.
- Store it in the fridge and feed it once a week to keep it alive for future baking.
This is exactly how I maintain mine. I keep my starter in the fridge, feed it weekly using the same discard-and-replace method above, and pull it out whenever I'm ready to bake.
How I Keep My Starter Going (Baking Fresh Bread Daily)
I've had this same starter going for months now, and it's become such a natural part of my kitchen routine. Because it lives right in my fridge, I always have it on hand — no last-minute grocery runs, no starting over from scratch.
Most weeks, I'm pulling a portion out to bake fresh loaves for my family almost daily. It genuinely surprised me how low-maintenance this turned out to be once the starter was established. The hardest part is really just those first 5 to 7 days of feeding it twice a day — after that, it's a simple weekly feeding if it's living in the fridge, and it's ready to work whenever I need it. Sometimes mine starts to bubble in as little as 4 days.
Using a store-bought gluten-free flour blend has made this so much more sustainable for me long-term. I'm not measuring out five different specialty flours every time I feed it — I just grab the same bag I already have in my pantry. That simplicity is honestly why this starter has survived months in my kitchen when past attempts with more complicated recipes didn't.

Tips for Sourdough Starter Success
- Be consistent with feedings, especially in that first week — twice a day, roughly 12 hours apart, gives your starter the best chance to establish itself.
- Whisk briskly — incorporating air really does make a difference in activating the natural yeast.
- Use room-temperature water rather than cold straight from the tap.
- Keep it away from direct sunlight and drafts during the initial fermentation period.
- Don't panic over a little liquid on top (sometimes called "hooch") — this can happen if your starter is hungry; simply stir it in or pour it off, then feed as usual
- Label your jar with the date of your last feeding so you don't lose track
Recipe FAQs
Typically about 5 days to a full week of twice-daily feedings, until you see consistent bubbling throughout the mixture.
Yes — a standard store-bought gluten-free all-purpose flour blend works well for this recipe. There's no need for specialty or single-grain gluten-free flours.
If you're storing it in the fridge, feeding it once a week is enough to keep it alive and healthy. If you're keeping it at room temperature to bake more frequently, it will need more regular feedings.
Discarding simply means removing a portion of the existing mixture before feeding. This keeps the starter at a manageable volume and maintains the right balance of flour to fermented mixture as you continue feeding it over time.
Fermentation speed depends on your kitchen's temperature and the specific flour blend you're using. Give it the full week before troubleshooting, and make sure you're feeding it consistently twice a day.
You can use it right away once it's bubbly and active. Storing it in the fridge is simply for maintaining it between bakes.
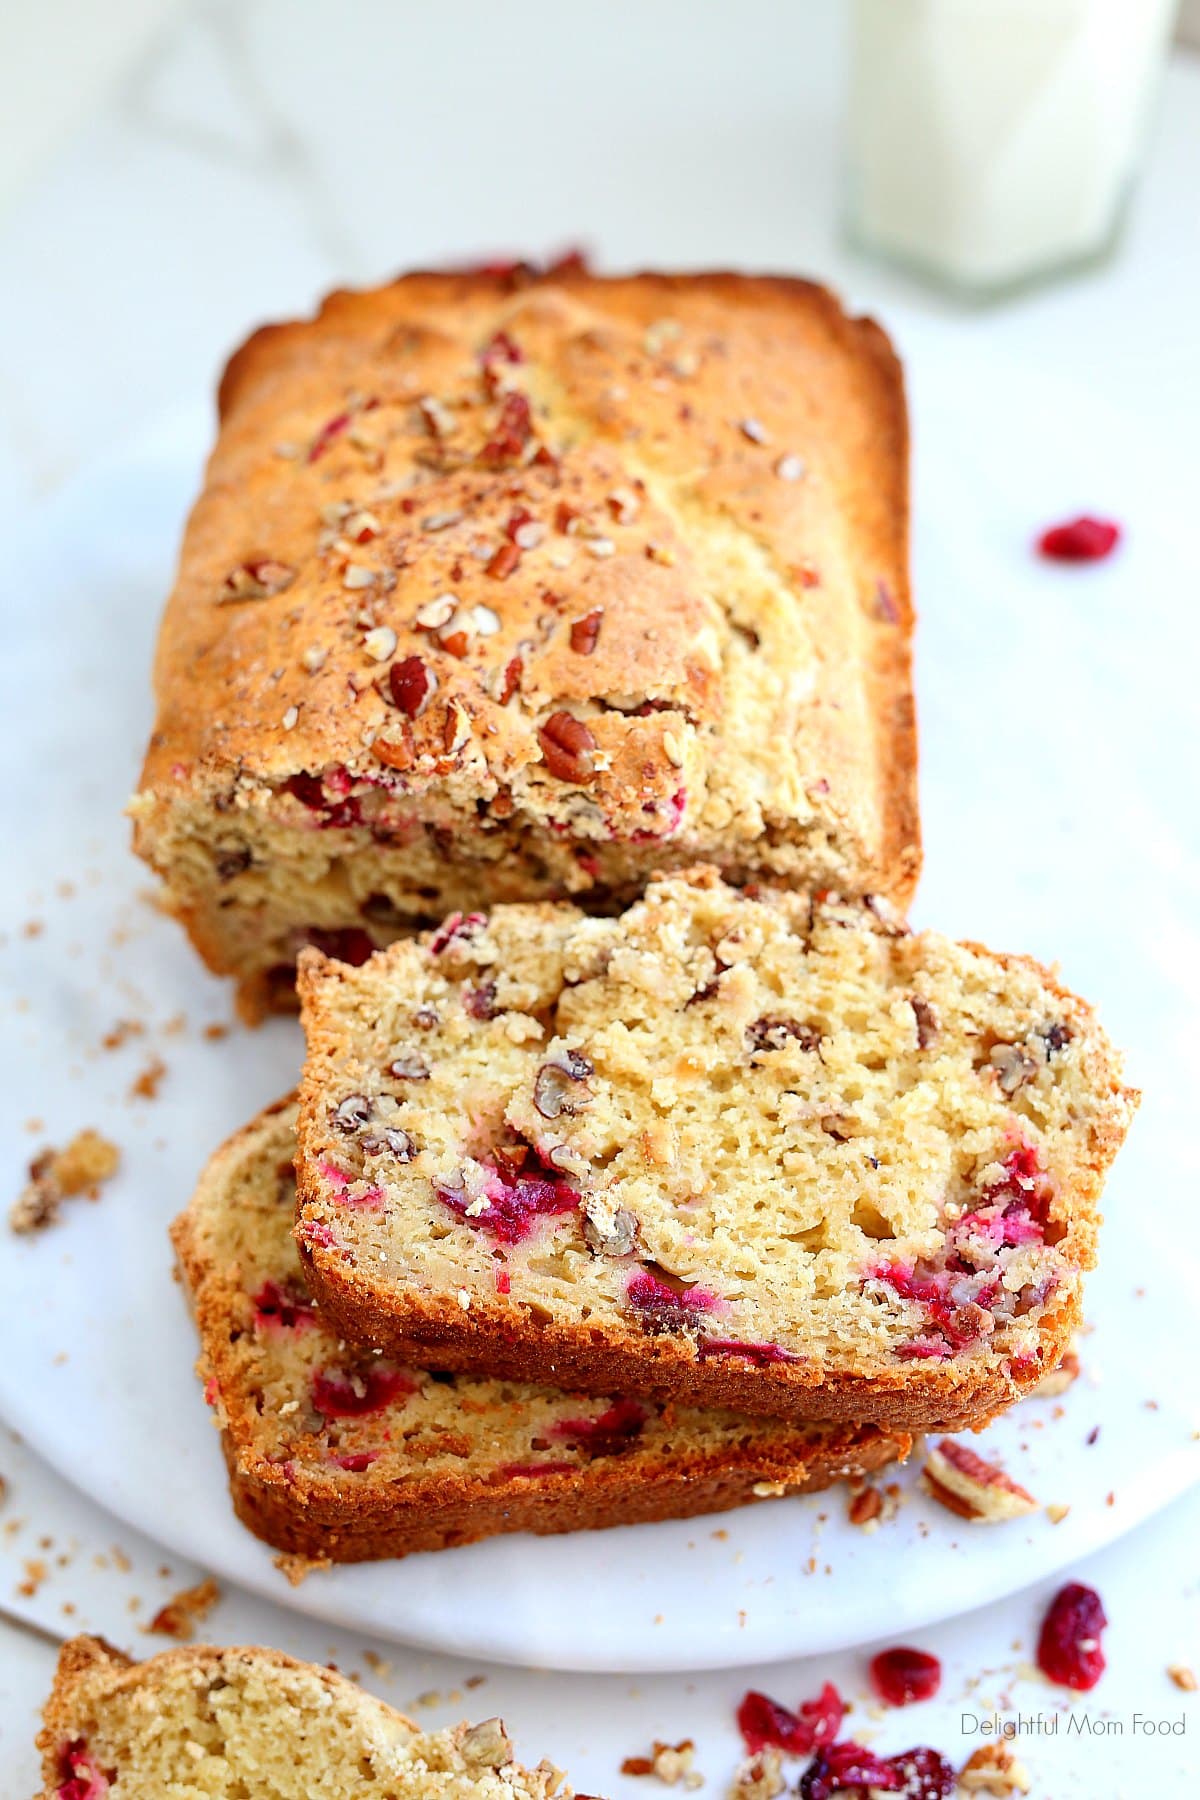
Ready to Bake? Once your gluten-free sourdough starter is bubbly, active, and ready to go, it's time for the fun part — baking. [Check out my gluten-free sourdough bread recipe here] to turn your starter into a fresh, homemade loaf.
This starter has become such a staple in my kitchen, and I hope it becomes one in yours too. There's something so satisfying about having a jar of this living, bubbling mixture on hand, ready to turn into fresh bread whenever you need it.
More Gluten-Free Bread Recipes
Have questions about your starter or want to share how yours turned out? Drop a comment below — I'd love to hear about it!
If you make this recipe I would love to see your creations and share it! Follow along with me on Instagram, Pinterest, Facebook, YouTube and Twitter to be featured and for more recipe inspiration!

Gluten-Free Sourdough Starter
Would you like to save this?
Plus get latest recipes and emails.
Equipment
- Mesh bag or nut bag to cover the jar
Ingredients
- 1 tablespoon sugar
- ¼ cup gluten-free flour blend plus more daily, use King Author Gluten-free Bread Flour or Bobs Red Mill Gluten-free 1-1 flour.
- ¼ cup water plus more daily
Instructions
- Step 1: Mix Your Starter In your 32-ounce mason jar, combine:¼ cup gluten-free flour blend¼ cup water1 tablespoon sugarMix briskly with a fork or whisk until fully combined. Cover loosely (a lid set on top wtih plastic wrap or a mesh bag with a rubber band, works well) and set the jar somewhere at room temperature, out of direct sunlight.
- Step 2: Feed Your Starter Twice a DayEvery morning and night for about 5 days to a full week, you'll "feed" your starter. Discard 1 tablespoon of the mixture from the jarAdd ¼ cup gluten-free flour blendAdd ¼ cup waterWhisk briskly for about 30 seconds — this is important, as it works air into the mixture, which helps feed the natural yeastRepeat this process every morning and every night for approximately 5 days to a week.
- Step 3: Watch for BubblesYou'll know your starter is alive and active when you start to see bubbles forming on the surface and throughout the mixture. This is the wild yeast and bacteria doing their job, producing carbon dioxide as they ferment. Depending on your kitchen's temperature and the flour blend you're using, this can take anywhere from 5 days to a full week. Some starters take a little longer — don't get discouraged if yours needs an extra day or two.
- Step 4: Store and MaintainUse it right away to make your first loaf of gluten-free sourdough bread.Store it in the fridge and feed it once a week to keep it alive for future baking.
Notes
- Be consistent with feedings, especially in that first week — twice a day, roughly 12 hours apart, gives your starter the best chance to establish itself.
- Whisk briskly — incorporating air really does make a difference in activating the natural yeast.
- Use room-temperature water rather than cold straight from the tap.
- Keep it away from direct sunlight and drafts during the initial fermentation period.
- Don't panic over a little liquid on top (sometimes called "hooch") — this can happen if your starter is hungry; simply stir it in or pour it off, then feed as usual
- Label your jar with the date of your last feeding so you don't lose track


Leave a Reply