
This easy gluten-free sourdough bread recipe uses King Arthur gluten-free bread flour and your starter for a soft, delicious loaf anyone can make daily. No kneading required. This is not sponsored. I just love how this flour makes it so easy for anyone to make sourdough fresh at home!

I still remember the first time I pulled a real loaf of gluten-free sourdough bread out of my oven. It actually looked like bread, sliced like bread, and tasted like something worth putting effort into again the next day. I nearly cried a little. If you've spent any time in the gluten-free world, you know how rare that feeling is.
I have made breads like this gluten-free bread loaf, and gluten-free soda bread, but there is something so much easier and tastier about fresh sourdough. Plus the fermentation is better for you!
Jump to:
For years, "gluten-free bread" meant something dense, crumbly, and honestly kind of sad — the kind of loaf you choke down because it's your only option, not because you want to. Store-bought gluten-free bread is expensive, it goes stale in about a day, and so much of it is packed with gums, preservatives, and ingredients I can't even pronounce.
This gluten-free sourdough bread recipe changed all of that for me. Once I had my starter going (if you haven't made yours yet, [start here with my gluten-free sourdough starter recipe]), this bread became something I make almost every single day. Not because I have to — because it's genuinely that easy once you have the rhythm down, and my family goes through it faster than I can bake it.
I use King Arthur gluten-free bread flour specifically for this recipe, and it's the ingredient that makes the whole thing foolproof. It's formulated to behave more like real bread flour than a typical all-purpose gluten-free blend, which means this loaf actually holds together, rises properly, and has that soft, slightly chewy texture we all miss from regular sourdough.
If you can stir a bowl of batter, you can make this bread. No kneading, no stand mixer required, no complicated shaping technique. Let me walk you through it.

Why This Recipe Works
- Uses your active gluten-free sourdough starter — put that starter to work instead of just feeding it.
- King Arthur gluten-free bread flour is specifically designed for yeasted breads, giving you a texture regular gluten-free flour blends can't match.
- No kneading — this dough comes together more like a thick batter, so there's no fussing with sticky gluten-free dough on your counter.
- Simple pantry ingredients — nothing exotic, nothing you can't find at a regular grocery store.
- Makes a full, sliceable loaf — this isn't a flat, dense brick. It rises, it slices, it holds up to a sandwich.
Recipe Ingredients
- 2 cups active gluten-free sourdough starter - I measure in the mason jar where it is at then scoop it out with a spoon where there are two cup marks and eye ball it.
- 2 ½ cups King Arthur gluten-free bread flour
- 1 ½ cups water
- 3 tablespoons olive oil
- 1 tablespoon honey
- 1 tablespoon pink salt
That's it. Six ingredients, and I'd bet most of them are already in your kitchen.
How to Make Gluten-Free Sourdough Bread
Step 1: Mix the Ingredients
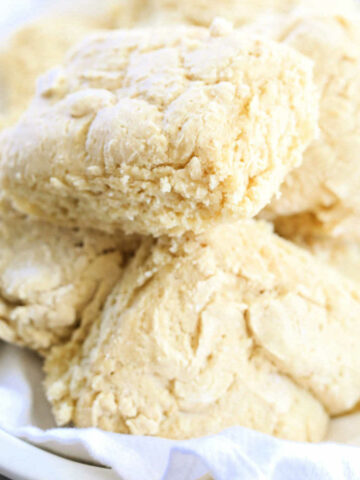
In a large mixing bowl, combine your active sourdough starter, flour, water, olive oil, honey, and salt. Stir until well combined. Your starter should be bubbly and active — this is what's going to help the bread rise, so don't skip checking on it before you start.
Mix with a sturdy spatula for 10 minutes (this helps get air into the dough) until everything is fully combined into a thick, smooth batter-like dough. It won't look or feel like traditional wheat dough — that's completely normal with gluten-free baking. There's no need to knead it, just mix it. You can use an electric stand mixer with a dough attachment as well.

Step 2: Let It Rise
Cover the mixing bowl with the dough with plastic wrap and let it rise in a warm spot until it looks noticeably puffed, generally 6-12 hours depending on how active your starter is and how warm your kitchen is. For best results I make this at night and bake it in the morning for the day. You can also make it in the morning and bake it at night.

Step 3: Score and Bake
Preheat your oven to 450°F. Transfer the dough onto a floured piece of parchment paper, careful not to deflate it. Use a sharp knife to score the top of the loaf with a few shallow slashes — this helps control how the bread expands as it bakes. While the dough rests, place a Dutch oven in the oven to preheat for 25 minutes. When the Dutch oven is heated, tranfer the parchment paper with the dough into the Dutch oven. Cover and bake for 50 minutes. Until the top is deeply golden and the loaf sounds hollow when tapped.
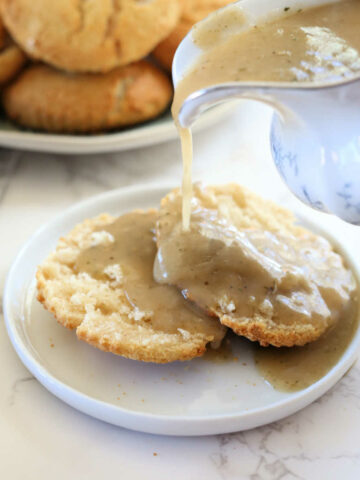
Step 4: Cool Completely
This is the step everyone wants to skip, and I get it — the smell alone is torture. But let the loaf cool completely on a wire rack before slicing.

How This Bread Became Part of My Everyday Life
I bake this loaf almost daily now, and I mean that literally. Once my starter was established and I had this recipe down, making fresh bread stopped being some special weekend project and just became part of my normal routine, the same way some people always have coffee going in the morning.
What changed things for me wasn't just the taste — it was how easy it became once I stopped overthinking it. I don't measure with precision anymore, I don't stress if my rise time runs a little long or short, and I definitely don't treat this like a delicate process. I mix it, let it rise while I go about my day, and bake it. My family doesn't touch store-bought bread very often anymore, and honestly, neither do I.
There's something so satisfying about having warm, homemade bread on the counter that didn't cost $8 a loaf and doesn't go stale by tomorrow. If you're gluten-free and you've been missing that experience, this recipe is genuinely worth the small learning curve. Once you make it once, you'll see how repeatable it really is.
Tips for the Best Gluten-Free Sourdough Bread
- Make sure your starter is active before you begin — it should look bubbly and have roughly doubled since its last feeding.
- Don't rush the cooling step — I know, I know, but it makes a real difference in texture.
- Warm spots speed up the rise — I often set my dough near a sunny window or on top of the fridge.
- Store leftovers in an airtight container or bread bag at room temperature for a couple of days, or slice and freeze extra for toast later.
- King Arthur gluten-free bread flour matters here — a standard all-purpose gluten-free blend will not give you the same rise or texture, since it isn't formulated for yeasted bread.

Recipe FAQs
This recipe is specifically developed around King Arthur gluten-free bread flour, which is formulated for yeasted breads rather than general baking. Swapping in a standard all-purpose gluten-free blend may result in a denser loaf or affect the rise, so it's worth seeking out the bread flour specifically.
You can use Bob's Red Mill 1-1 Gluten-Free flour, but do 3 cups of the flour instead of 2.5.
No kneading is required. The dough comes together more like a thick, smooth batter rather than traditional wheat dough, and mixing it well by hand or with a spatula for 10 minutes is all it needs. You can also use an electric dough mixer.
Generally 6 to 12 hours, depending on how active your starter is and the temperature of your kitchen. Look for the dough to appear noticeably puffed rather than watching the clock exactly. I like to make mine at night and let it rise overnight.
Gluten-free bread continues to set its internal structure as it cools. Slicing too early can leave the center gummy or under-set, even if the bread is fully baked.
Yes — this bread freezes well. Slice it first, then store in a freezer-safe bag so you can pull out individual pieces for toasting whenever you need them.
Bake This on Repeat
This is one of those recipes that feels like a big deal the first time you make it, and then becomes second nature by the third or fourth loaf. If you haven't made your gluten-free sourdough starter yet, [that's the first step] — and once it's active, this bread is genuinely something you can make daily, the way I do.
More Gluten-Free Bread Recipes

Have questions about your dough, your starter, or your bake? Leave a comment — I read every one.
I'd love to hear how your loaf turns out — drop a comment below with your results, or tag me if you bake it! Follow along with me on Instagram, Pinterest, Facebook, YouTube and Twitter to be featured and for more recipe inspiration!

Gluten-Free Sourdough Bread Recipe
Would you like to save this?
Plus get latest recipes and emails.
Ingredients
- 2 cups active gluten-free sourdough starter I measure in the mason jar where it is at then scoop it out with a spoon where there are two cup marks and eye ball it.
- 2 ½ cups King Author Gluten-Free Bread Flour
- 1 ½ cups water
- 3 tablespoon olive oil
- 1 tablespoon honey or maple syrup for a vegan version
- 1 tablespoon pink Himalayan salt
Instructions
- Step 1: Mix the IngredientsIn a large mixing bowl, combine your active sourdough starter, flour, water, olive oil, honey, and salt. Stir until well combined. Your starter should be bubbly and active — this is what's going to help the bread rise, so don't skip checking on it before you start.Mix with a sturdy spatula for 10 minutes (this helps get air into the dough) until everything is fully combined into a thick, smooth batter-like dough. It won't look or feel like traditional wheat dough — that's completely normal with gluten-free baking. There's no need to knead it, just mix it. You can use an electric stand mixer with a dough attachment as well.
- Step 2: Let It RiseCover the mixing bowl with the dough with plastic wrap and let it rise in a warm spot until it looks noticeably puffed, generally 6-12 hours depending on how active your starter is and how warm your kitchen is. For best results I make this at night and bake it in the morning for the day. You can also make it in the morning and bake it at night.
- Step 3: Score and BakePreheat your oven to 450°F. Transfer the dough onto a floured piece of parchment paper, careful not to deflate it. Use a sharp knife to score the top of the loaf with a few shallow slashes — this helps control how the bread expands as it bakes. While the dough rests, place a Dutch oven in the oven to preheat for 25 minutes. When the Dutch oven is heated, tranfer the parchment paper with the dough into the Dutch oven. Cover and bake for 50 minutes. Until the top is deeply golden and the loaf sounds hollow when tapped.
- Step 4: Cool CompletelyThis is the step everyone wants to skip, and I get it — the smell alone is torture. But let the loaf cool completely on a wire rack before slicing.
Notes
- Make sure your starter is active before you begin — it should look bubbly and have roughly doubled since its last feeding.
- Don't rush the cooling step — I know, I know, but it makes a real difference in texture.
- Warm spots speed up the rise — I often set my dough near a sunny window or on top of the fridge.
- Store leftovers in an airtight container or bread bag at room temperature for a couple of days, or slice and freeze extra for toast later.
- King Arthur gluten-free bread flour matters here — a standard all-purpose gluten-free blend will not give you the same rise or texture, since it isn't formulated for yeasted bread.

Leave a Reply